Connecting SHIPM8 to Exact Online
Linking SHIPM8 to Exact Online lets SHIPM8 send data — such as invoices — straight into your Exact Online administration. Setting this up takes two parts:
- In Exact Online — register SHIPM8 as an app, which produces the keys the connection needs.
- In SHIPM8 — add the connection on your profile and request a token to confirm it works.
You'll need access to an Exact Online administration with rights to Import/Export app registrations, and a SHIPM8 account that has the Service connections permission. If you don't, ask your administrator.
Part A — Register the app in Exact Online
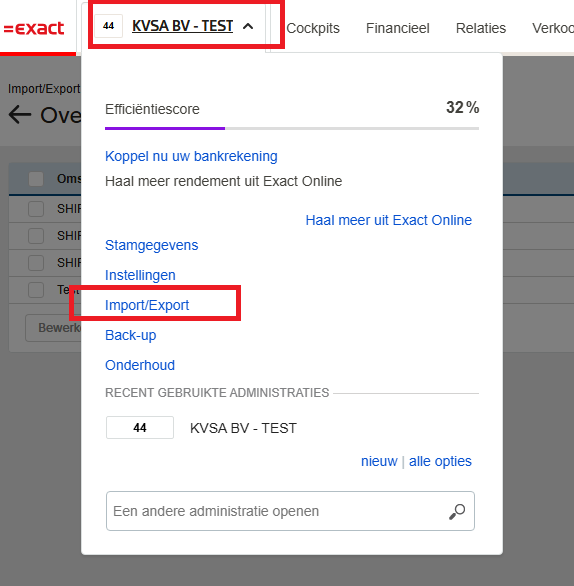
1. Open Import/Export
Log in to your Exact Online administration. Click the administration name in the top-left corner to open the menu, then choose Import/Export.
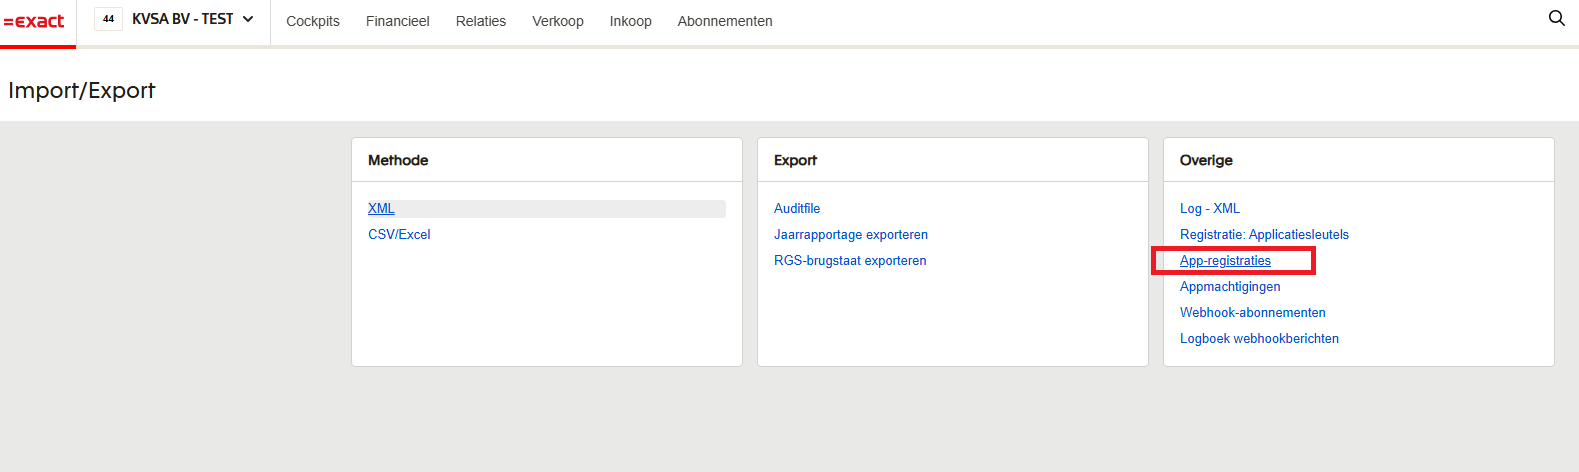
2. Open App registrations
On the Import/Export page, look in the Overige (Other) column and choose App-registraties (App registrations).
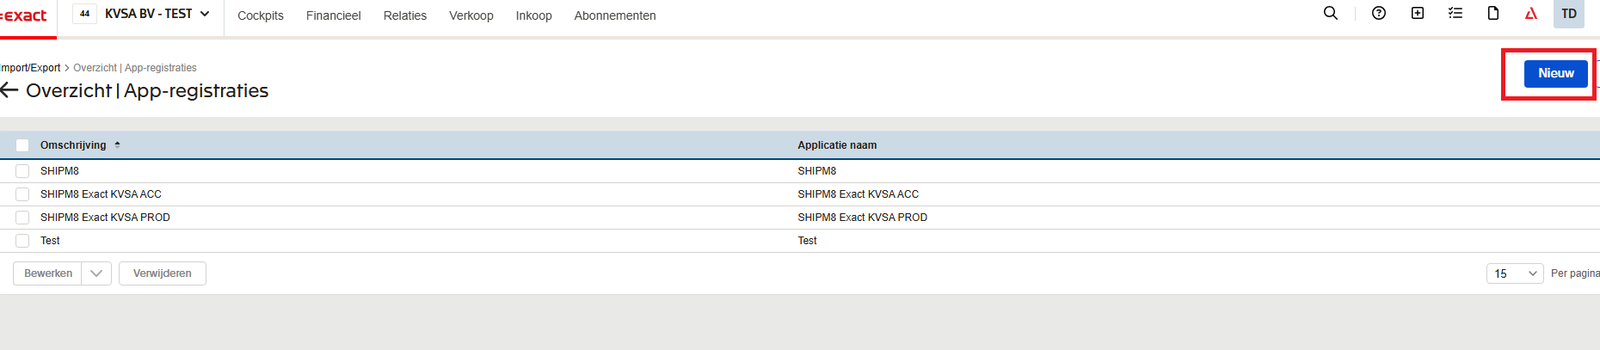
3. Create a new registration
On the Overzicht | App-registraties screen, click Nieuw (New) in the top-right corner.
4. Fill in the registration details
Complete the Autorisatiegegevens (Authorisation details) fields, then click Opslaan + Bewerken (Save + Edit) at the top right.

| Field | What to enter |
|---|---|
| Applicatie naam (Application name) | A recognisable name, e.g. SHIPM8. |
| Redirect URI | The SHIPM8 callback address. The default is https://shipm8.nl/service-connections/connections/thank-you/exactonline. |
| Omschrijving (Description) | A short description, e.g. SHIPM8 connection. |
After you save, Exact Online generates a Client ID and Client Secret for the registration.
The Client ID and Client Secret are what SHIPM8 uses to identify itself to Exact Online. You'll enter them into SHIPM8 in Part B, so keep this screen within reach. Treat the Client Secret like a password.
Part B — Set up the connection in SHIPM8
With the app registered, you can now add the connection to your own profile and request a token.
5. Open Service connections on your profile
In SHIPM8, go to your profile page. In the Service connections card, follow More service connections » to open the connections overview.
6. Add the connection
Click New and select the Exact Online connection from the list. Then fill in the connection details:
| Field | What to enter |
|---|---|
| Client ID | The Client ID from your Exact Online app registration (Part A). |
| Client Secret | The Client Secret from your Exact Online app registration (Part A). |
| Division ID | Your Exact Online administration code — see Finding your Division ID below. |
Click Save. The connection now appears in your list of service connections.
Finding your Division ID
Your Division ID is the Administratie code (administration code) of your Exact Online administration. To find it:
- Log in to your Exact Online account.
- Click your administration name in the top-left corner of the dashboard.
- Choose All options (Alle opties).
- A list of all your administrations appears. Hover your mouse over the code in the Code column — don't click it.
- The full URL appears at the bottom of your browser window. Your Division ID is
the number between
=and&— for example, in...&_Division_=12345&...the Division ID is12345.
7. Request a token
Open the connection you just added. In its detail panel, click the token button (Regenerate) to request a token. You'll be taken to Exact Online to authorise the connection — sign in and confirm if prompted.
8. Confirm it works
Back in SHIPM8, the connection now shows an Access token and an Expiration date, with a green Valid badge. That confirms SHIPM8 and Exact Online are connected.
If the badge shows Expired or no token appears, open the connection again and request the token once more. A token has a limited lifetime — when it expires, use the same Regenerate button to refresh it.